
How to Make a Walmart Receipt Online (Step-by-Step Guide)
Creating a Walmart receipt online is easier than you might think. Whether you need it for tracking expenses, replacing a lost receipt, or other purposes, tools like Receipt Generator can help you replicate Walmart's receipt format in just a few steps. Here's a quick summary of what you need to know:
- Key Components: Walmart receipts include store details, transaction codes, itemized purchases, and payment summaries.
- Tools: Use Receipt Generator, a free tool with Walmart-specific templates. It allows you to customize details like store numbers, items, prices, and discounts.
- Steps:
- Understand Walmart receipt elements (e.g., TC#, ST#, OP#).
- Choose a Walmart receipt template on Receipt Generator.
- Enter store info, item details, and payment information.
- Download the receipt as a high-quality PNG file.
- Optional Features: Add realistic backgrounds using AI tools for a polished look.
This method is quick, requires no account, and ensures your receipt looks just like the real thing. Let’s dive into the details.
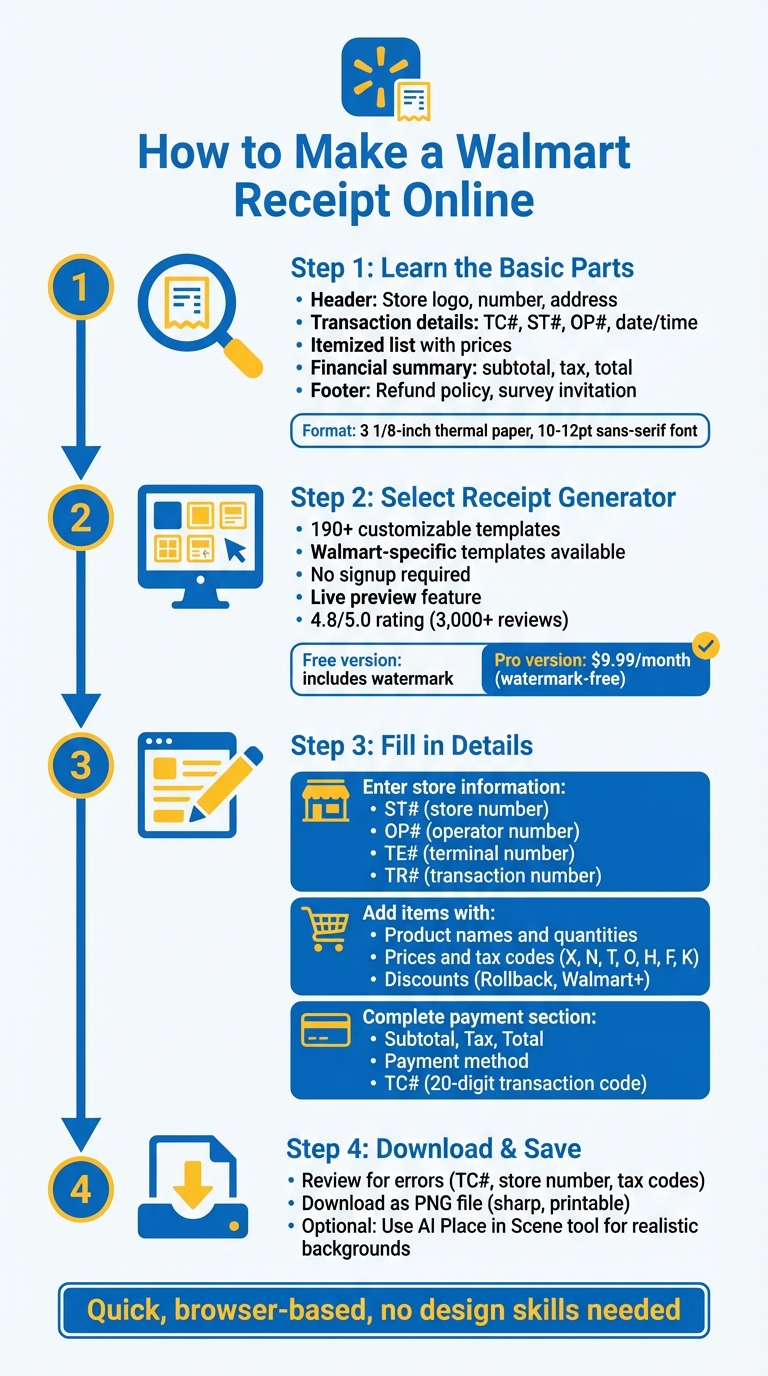
4-Step Process to Create a Walmart Receipt Online
Step 1: Learn the Basic Parts of a Walmart Receipt
To create a realistic Walmart receipt, it's important to understand its key components. This knowledge ensures your receipt closely resembles authentic Walmart documentation, whether for personal or business purposes.
What Information Appears on a Walmart Receipt
A genuine Walmart receipt includes several essential details:
- Header Information: The top of the receipt features the Walmart logo, store number, store address, and phone number, making it easy to identify the specific purchase location.
- Transaction Details: This section lists the purchase date, time, register number, cashier ID, and a unique Transaction Code (TC#). The TC# is particularly useful for retrieving transaction records or processing returns.
- Itemized List: Products are listed with details such as their description, quantity, unit price, department, and whether they qualify for EBT/SNAP benefits.
- Financial Summary: This part breaks down the subtotal, any discounts (like Rollbacks or Walmart+ savings), applicable taxes, and the final total amount due.
- Card Transactions: For purchases made with a card, the receipt includes the card type and the last four digits of the card number to protect privacy.
- Footer Details: The bottom of the receipt usually contains Walmart's refund policy, privacy notices, and an invitation to participate in a customer survey.
How Walmart Receipts Are Formatted
Walmart receipts are printed on 3 1/8-inch thermal paper using a clean, sans-serif font sized between 10 and 12 points. The layout is compact and vertical, with clear text blocks separated by lines or asterisks to make the information easy to read.
Key details like the transaction total are emphasized with bold or larger text, helping customers quickly find important information, whether they're reviewing prices or handling a return.
Once you're familiar with these elements, the next step is selecting a receipt generator to customize your receipt as needed.
sbb-itb-2232899
Step 2: Select Receipt Generator for Your Walmart Receipt
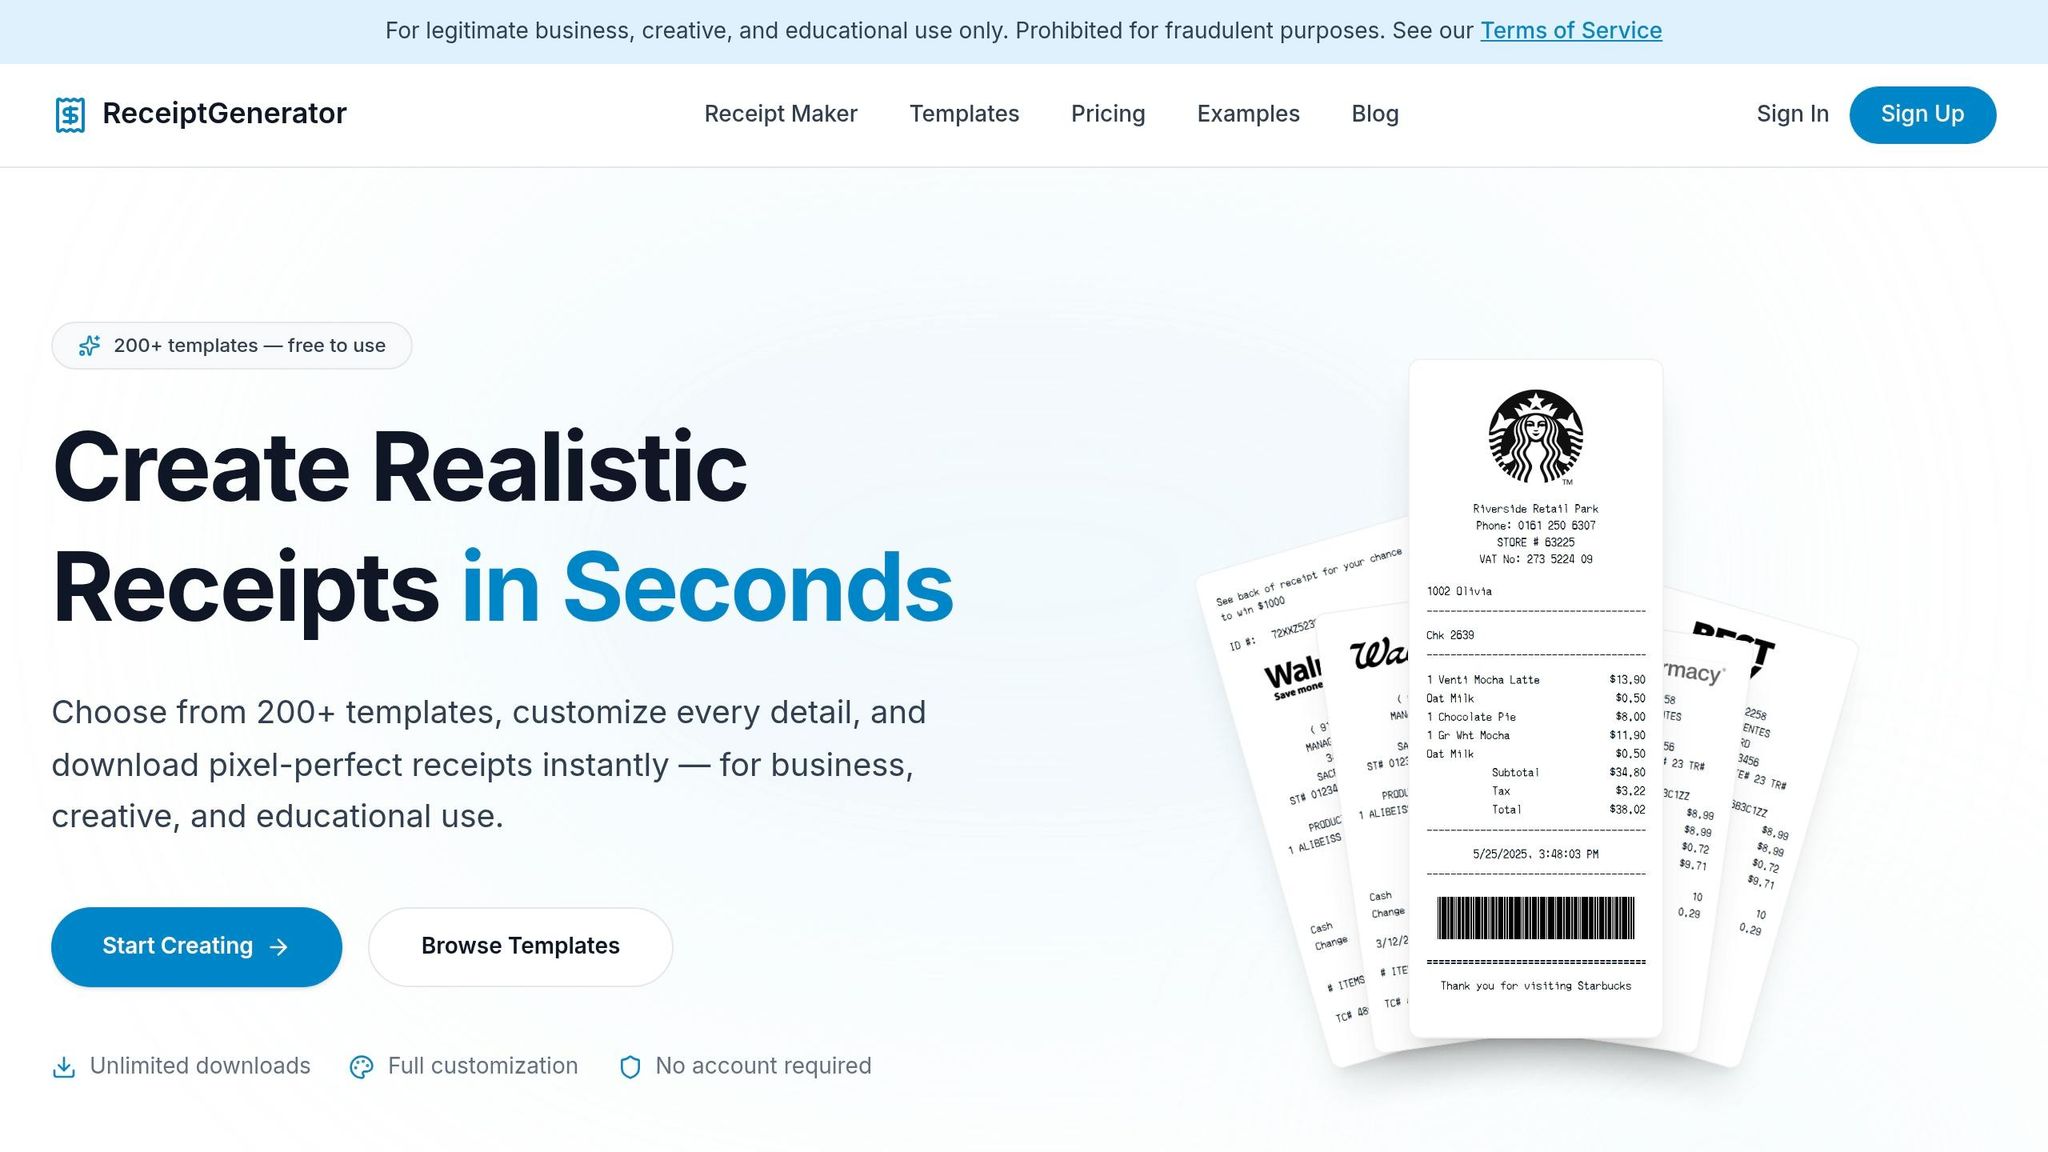
Now that you understand the key components of a Walmart receipt from Step 1, the next step is choosing the right tool to create one. Receipt Generator is a top choice for crafting detailed Walmart receipts with all the necessary elements. It allows for precise customization, ensuring your receipt looks just like the real thing.
Why Use Receipt Generator?
Receipt Generator offers more than 190 customizable templates, including several designed specifically for Walmart receipts. These templates closely mimic the thermal receipt style used in Walmart stores. The best part? You don't need to sign up - just jump right in and start building your receipt.
The Walmart-specific templates come preloaded with essential fields such as TC, ST#, OP#, TE#, and TR#, ensuring your receipt includes all the key details. You can also add Walmart-specific features like Rollback savings, Walmart+ discounts, and SNAP/EBT eligibility markers for grocery items.
"The receipt font used in this template is an exact replica of the thermal printer used at Walmart stores." - ExpressExpense
The tool includes a live preview, so you can see updates to your receipt in real time. It even adds realistic thermal paper textures to the final PNG file, giving it the same appearance as a physical receipt. With a 4.8/5.0 rating from over 3,000 reviews, users frequently highlight its accurate fonts and layouts.
With these features, Receipt Generator makes it simple to create a professional-looking Walmart receipt. Let’s explore how to find the right Walmart template on the platform.
Finding the Walmart Receipt Template
Once you're ready to start, finding the Walmart template on Receipt Generator is straightforward. Head to their website and navigate to the templates section. Walmart templates are usually listed under "Retail" or "Big Box Retail" categories. You might also spot them in sections like "Most-used" or "Popular" templates.
After locating the Walmart template, click "Choose Template" or "Select Template" to open the editor. The platform offers variations such as "Walmart Receipt V2" or templates for EBT/SNAP purchases. Pick the version that suits your needs, whether you're creating a standard retail receipt or one that includes food stamp eligibility details.
The free version allows you to customize and preview your receipt. However, downloaded receipts will include a watermark. To remove it, you can upgrade to the Pro plan for $9.99/month.
Step 3: Fill in Your Walmart Receipt Details
Now that you've chosen your template, it's time to personalize it with the details of your transaction. The Receipt Generator editor allows you to tweak each field to mirror a genuine Walmart receipt. Simply click on each section to input your information.
Enter Store Information
Begin by filling in the store's header details. Every Walmart receipt starts with the Walmart logo, followed by their slogan: "Save money. Live better.". Below that, include the store's phone number and the Store Manager's name. Don't forget the store's full address, including the street, city, state, and zip code.
Next, move on to the identification codes. Here's what each code stands for:
- ST#: The four- or five-digit store number identifying the Walmart location.
- OP#: The cashier or operator number.
- TE#: The terminal (register) number.
- TR#: The transaction number unique to that particular register.
These codes are specific to each transaction and can be randomized to maintain authenticity.
Add Your Items and Prices
Once the store information is set, it’s time to list the purchased items and their prices. Organize the items in the order they would typically be scanned at checkout. Use abbreviations for brands when applicable, like "GV" for Walmart’s Great Value products. For each item, include the quantity, product name, and individual price.
After listing the price for each item, assign the correct tax code letter:
- X: Taxable items
- N: Nontaxable items
- T: Taxable sale items
- O: Nontaxable sale items
- H: HSA-eligible items
- F: Food items eligible for SNAP/EBT
- K: Manually keyed entries
For grocery receipts with SNAP-eligible items, use F to match Walmart’s receipt formatting. If there are discounts or special savings, such as Rollback savings, Walmart+ discounts, or price-match deductions, list them as separate line items to reflect the receipt's authentic structure.
Complete the Payment Section
After itemizing your purchases, finalize the receipt by adding payment details. Start with the financial totals, ensuring you include the Subtotal, Tax, and Total amounts in that order. Specify the payment method - options include Cash, Debit, Credit (Visa, Mastercard, etc.), or digital payments. For grocery receipts, you can also list EBT as a separate payment method.
Finally, add the TC# (Transaction Code), a unique 20-digit number found at the bottom of every Walmart receipt. This serves as the barcode for returns. Wrap up the receipt by showing the total number of items sold, formatted as "# ITEMS SOLD", followed by the item count.
Step 4: Download and Save Your Receipt
Once your receipt details are finalized, it’s time to save and download it. But before you hit that download button, take a moment to double-check everything.
Check Your Receipt for Errors
Review your receipt carefully to ensure all Walmart-specific details are accurate. Pay special attention to the Transaction Code (TC#) at the bottom - this is a key element for authentic Walmart receipts. Also, verify that the Store Number is correct and clearly visible. If your receipt includes SNAP-eligible grocery items, confirm that food items are marked with the correct tax code in the preview.
The editor automatically calculates totals for you, but it’s always a good idea to double-check the math. Once everything looks perfect, you’re ready to export your receipt.
Download as PNG File
Click the download button to save your receipt as a PNG file. This format ensures that the text remains sharp, whether you’re using it digitally or printing it out. PNG files are especially useful if you need to zoom in on specific details.
If you’re using the free version of Receipt Generator, your download will include a small watermark. For a watermark-free version that’s better suited for professional use, consider upgrading to the Pro subscription. This option also gives you unlimited downloads.
Create a Photo of Your Receipt with AI
Want to take your receipt to the next level? Use the AI Place in Scene tool to position your receipt on a realistic background. After downloading your PNG file, you can place your Walmart receipt on surfaces like a wooden desk, a marble countertop, or even alongside the items you’ve purchased. The AI automatically adjusts lighting, shadows, and perspective to make it look natural.
This feature is perfect for documentation or creative projects.
"The thermal paper texture and real store receipt templates make our scenes look 100% authentic" - James T., film producer
You can choose from preset backgrounds or upload your own photo. The AI will seamlessly blend your receipt into the scene, adding depth and texture for a polished, professional look.
Conclusion
Making a Walmart receipt online is simple with the right tool. Receipt Generator takes the hassle out of the process by offering ready-to-use Walmart templates. These templates include authentic layouts, thermal printer-style fonts, and the Walmart logo. Best of all, you don’t need any design skills - everything works directly in your browser.
Here’s a quick rundown of the steps: first, understand the key elements of a Walmart receipt. Next, choose the Walmart template, enter the store and transaction details, and download the receipt as a high-quality PNG file. The tool handles complex details like receipt codes and store identifiers automatically, so you don’t have to.
To make things even easier, Receipt Generator includes features like a live preview and an auto-calculator to minimize errors. You can also customize details like Rollback savings or SNAP/EBT eligible items. With thousands of users relying on it, the tool has built a solid reputation for dependability. Plus, the AI Place in Scene feature allows you to create realistic images of your receipt on any surface - no printing required.
This efficient process makes Receipt Generator a go-to solution for creating professional Walmart receipts quickly and easily.
FAQs
What details make a Walmart receipt look real?
To create what appears to be an authentic Walmart receipt, include critical details such as the store number (ST#), cashier number (OP#), register number (TE#), and transaction number (TR#). Add the store's full address, the manager's name, and contact information, along with Walmart’s logo at the top. Ensure the receipt lists itemized purchases, showing prices, quantities, and subtotals. Don’t forget to include the correct date, time, total amount, and payment method. For added realism, use a font style that resembles a thermal printer's output.
How do I find my Walmart store number and receipt codes?
You can locate your Walmart store number and receipt codes on either your physical or digital receipt. Typically, the store number is printed near the top or bottom of the receipt. If you’re using the Walmart app or website, your purchase history provides detailed transaction records, including store information and receipt codes. Additionally, tools like Receipt Generator allow you to customize receipts with store details for better record-keeping.
What’s the best way to print the downloaded PNG receipt?
To print a downloaded PNG receipt, open the file on your device using an image viewer or photo editing software. Make sure your printer is connected and set up correctly. For the best results, check the print settings to ensure the resolution and paper quality are adjusted appropriately.