
How to Add Logos to Receipts Online
Adding a logo to your receipts is a quick and effective way to make your business look professional and trustworthy. A branded receipt enhances your customer’s final impression and helps establish your identity. Using tools like Receipt Generator, you can easily upload your logo and customize receipts in minutes.
Key Steps:
- Prepare Your Logo: Use a high-resolution transparent PNG file (at least 300 DPI) to avoid pixelation or blurry edges.
- Select a Template: Choose from over 400 receipt templates tailored to various industries.
- Upload & Position Your Logo: Place the logo in the header, ensuring it’s well-aligned and not overcrowded.
- Customize Receipt Details: Add your business name, address, transaction details, and payment info.
- Preview & Export: Check for alignment and clarity, then download your receipt as a high-resolution PNG.
By following these steps, you’ll create professional receipts that reflect your brand effectively.
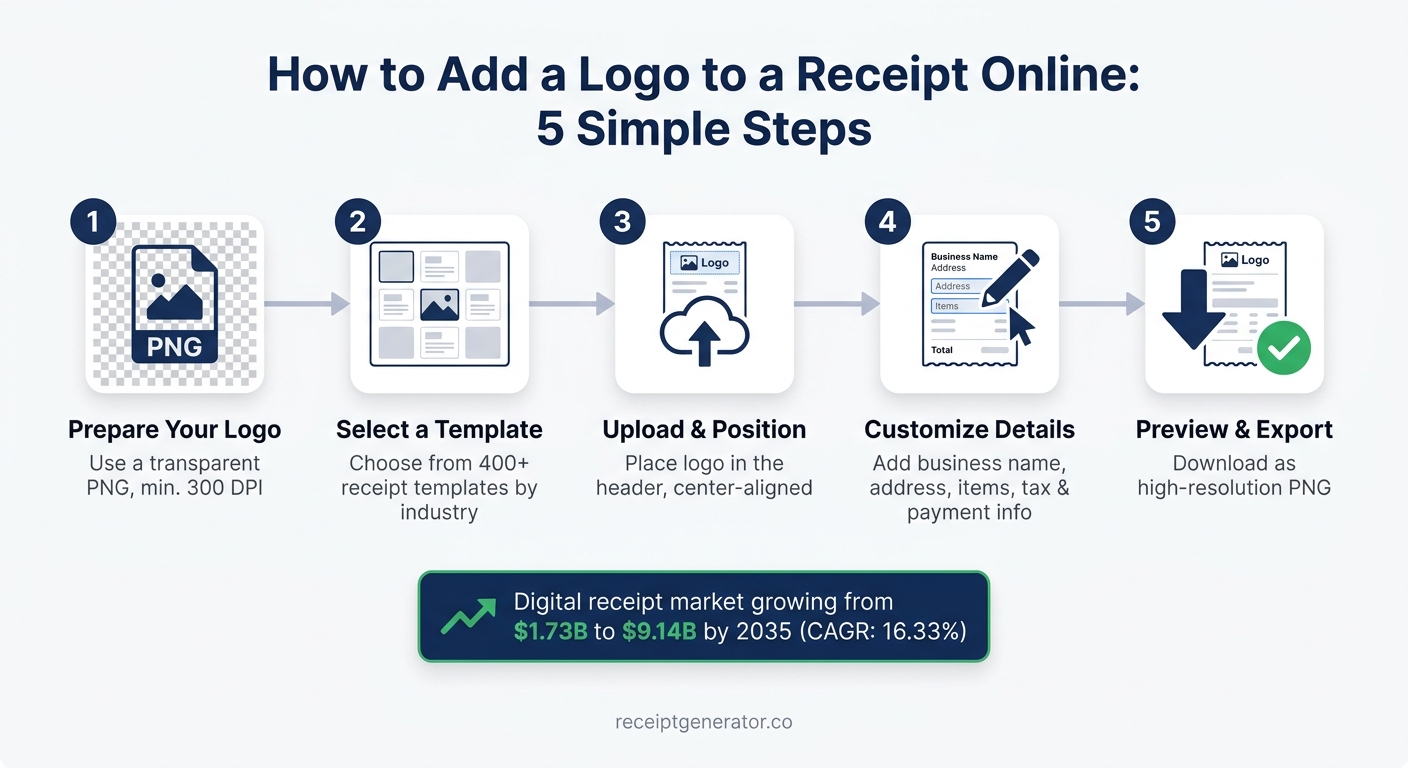
How to Add a Logo to a Receipt Online: 5 Simple Steps
Preparing Your Logo Before You Upload
Getting your logo ready before uploading is crucial to avoid issues like blurry edges, distorted shapes, or colors that look washed out. A high-quality file ensures your logo looks professional and fits seamlessly into your receipts.
Choosing the Right File Format
For receipt logos, PNG is the top choice. It supports transparency, meaning your logo will blend perfectly with the receipt background without an unsightly white box. JPG, while great for photos, doesn’t support transparency and isn’t ideal for this purpose. Another option is SVG, a vector format that maintains sharpness no matter the size. However, not all online receipt tools support SVG files. When unsure, stick to a transparent PNG for the best results.
Setting the Right Logo Dimensions and Resolution
To keep your logo crisp and clear, make sure it’s at least 300 DPI to avoid pixelation.
"Your logo should be at least 200 pixels wide and 200 pixels tall." - Square
Also, leave 20 pixels of white space around your logo to prevent it from crowding other receipt elements. When resizing, always lock the aspect ratio to maintain the original proportions and avoid distortion.
Adjusting Logo Design to Match Receipt Styles
Not all logos are suited for receipt layouts. Full-color designs with gradients can lose their impact on simple white backgrounds and may not print well on thermal paper. For thermal printing, convert your logo to grayscale or a high-contrast black-and-white version.
If your uploaded logo appears faint, increase the contrast by 15–25% before exporting again. On the other hand, if oversaturated colors make your logo blend too much with surrounding text, lower the saturation by 10–20%.
Here’s a quick troubleshooting guide to fix common logo issues:
| Problem | Cause | Fix |
|---|---|---|
| Pixelation | Low-resolution file | Use a minimum resolution of 300 DPI |
| Blurry edges | Wrong file format | Use a transparent PNG |
| Color bleeding | Oversaturated colors | Reduce saturation by 10–20% |
| Distortion | Improper scaling | Lock the aspect ratio when resizing |
| Faint appearance | Low contrast | Boost contrast by 15–25% |
sbb-itb-2232899
Step-by-Step: Adding a Logo with Receipt Generator
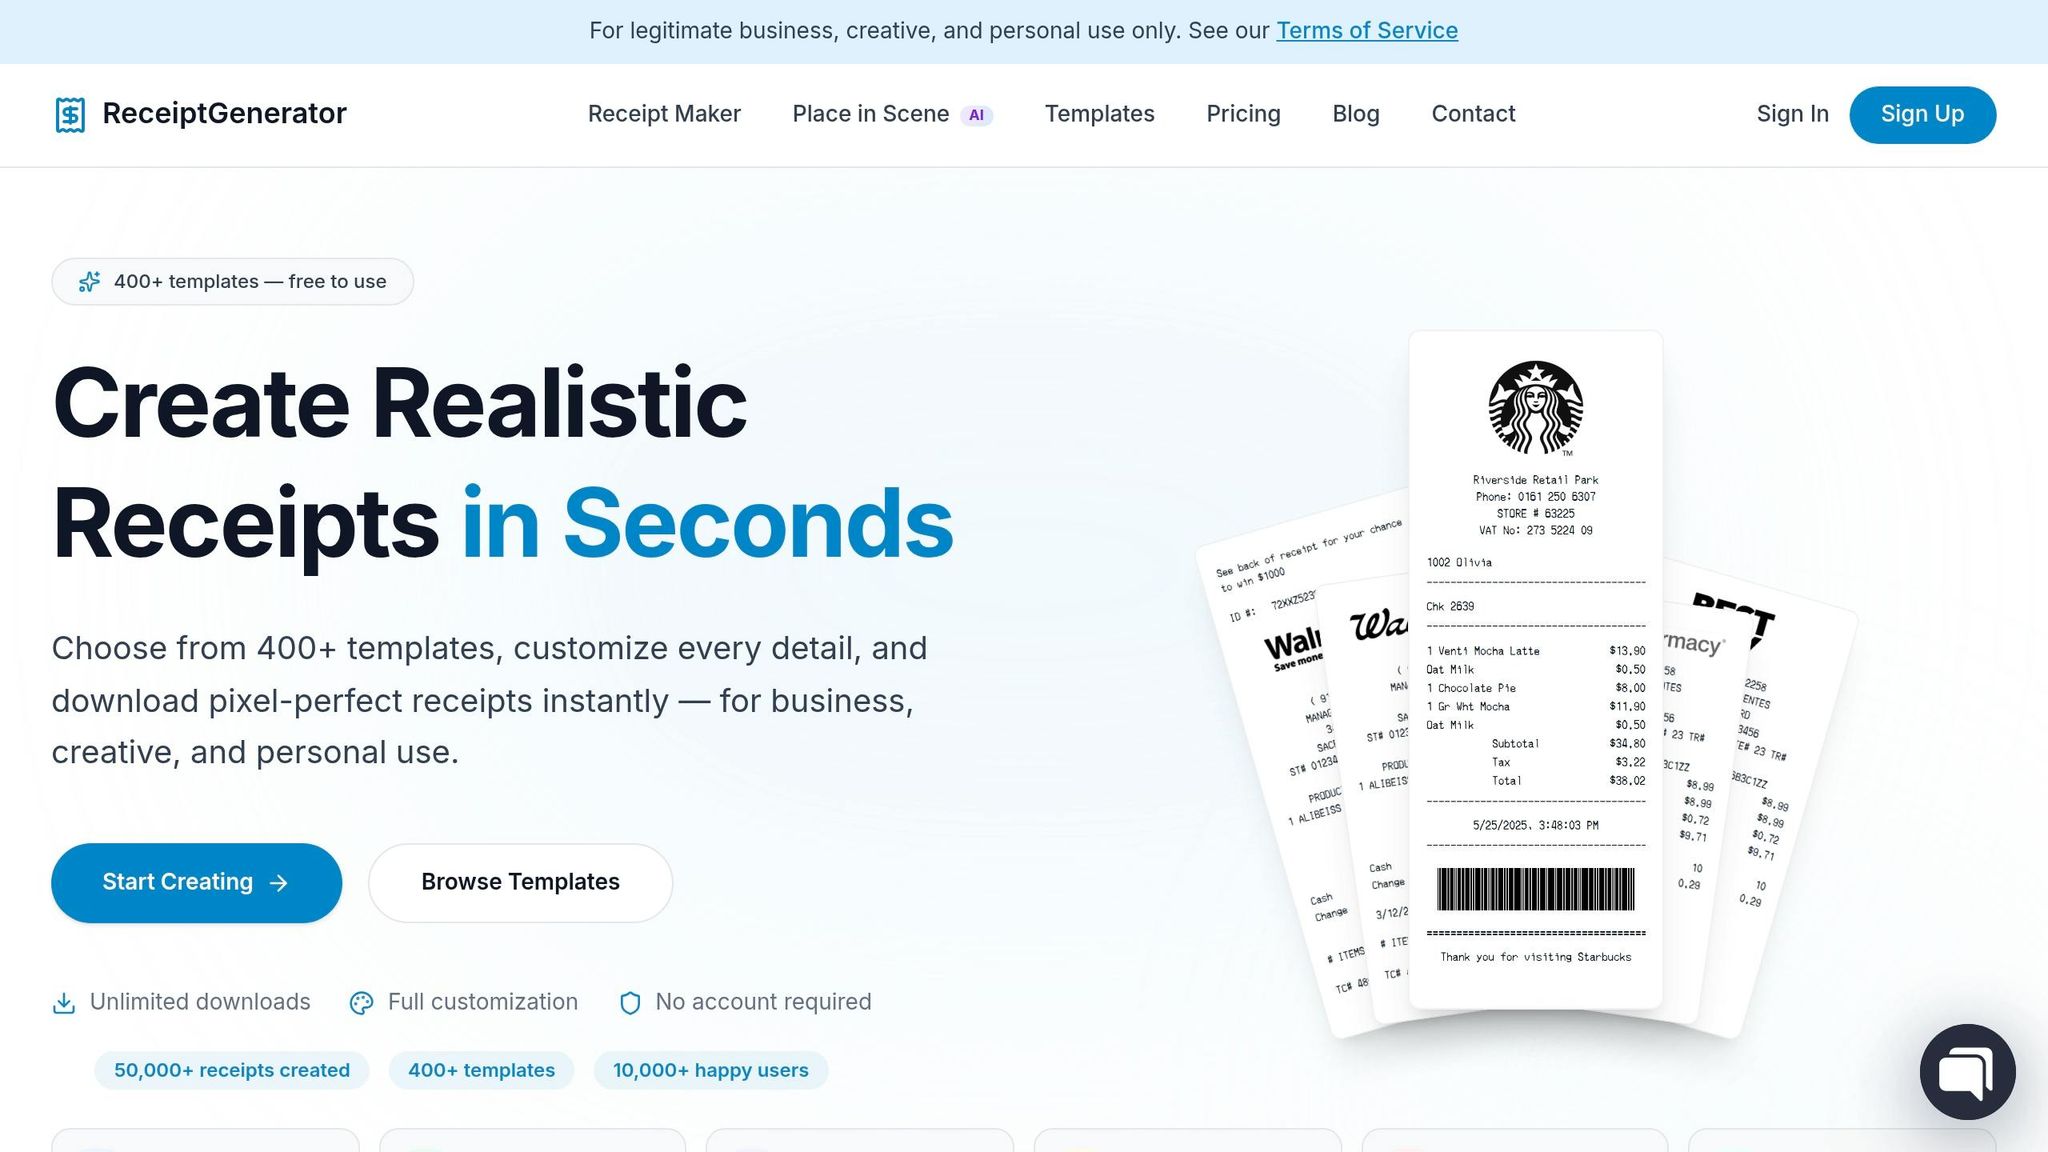
Here’s how to add your logo using Receipt Generator. The platform keeps everything in one editor - no need to jump between tools or tabs.
Picking a Receipt Template
Start by visiting Receipt Generator and browsing its library of over 400 templates. These templates are grouped by popular brands like Walmart, Target, and Starbucks, as well as by industry categories such as retail, restaurant, services, and hospitality. If you’re creating a receipt for your own business, go for a Generic or Custom layout to have a clean base to work with.
Choose a template that suits the type of receipt you need. For instance, a coffee shop receipt will look different from a service invoice. If you’re replicating a U.S. retail format, look for templates that include standard elements like a store header, itemized list, sales tax line, and footer. Picking the right template upfront can save you time during the editing process.
Uploading and Placing Your Logo
After selecting your template, it’s time to add your logo. Look for the logo upload field in the store header section. Click on it and upload your prepared PNG file from your device. Once uploaded, the logo will automatically appear in the receipt header.
Use the editor’s controls to resize the logo so it fits properly. Avoid making it too large or too small - aim for a size that complements the store name. For most receipt designs, center alignment is the most visually appealing and aligns with common layouts used by major U.S. retailers.
Editing Store Details and Receipt Content
With your logo in place, you can now customize the rest of the receipt. Start by filling in the store header details, including your business name, address (street, city, state, ZIP code), and phone number. Then, move on to the transaction details.
Add line items one by one by entering the quantity, item description, and unit price for each. The tool automatically calculates the subtotal for you. Specify your sales tax rate in the designated field (e.g., California’s base rate is 7.25%, though it may vary locally). You can also include optional details like discounts, payment methods (Cash, Visa, Mastercard, Apple Pay), and the last four digits of a card if applicable. Don’t forget to add the receipt number, date, and time to complete the transaction.
"A template for a coffee shop will already have spots for menu items and sales tax. One for a consultant will be set up for hourly rates and project details. It's a great way to make sure you don't forget something important." - ReceiptGen Team
Previewing and Exporting the Receipt
As you make changes, Receipt Generator updates the preview in real time, allowing you to spot and fix any typos or alignment issues. Double-check that your logo is properly placed in the header, the store details are accurate, and all calculations are correct.
Once you’re satisfied, click Export to download your receipt as a high-resolution PNG. This format is ideal for sharing digitally, attaching to emails, or printing. By following these steps, you’ll create a receipt that not only looks professional but also aligns with your business’s branding.
Fine-Tuning Logo Placement and Branding Details
Once you've uploaded your logo, the next step is refining its placement and adding thoughtful branding touches to create a polished, professional receipt. These small adjustments can make a big difference in how your business is represented.
Adjusting Logo Position and Alignment
The upper third of the receipt is prime real estate for your logo. It’s typically the first thing a customer notices, instantly connecting the receipt to your business. For a modern and professional vibe, consider a left-aligned logo. This approach is especially popular among service-oriented businesses and boutique brands.
Make sure to leave at least 20 pixels of white space around your logo to avoid a cluttered look. If your editor offers a grid system, use it to align the logo with the transaction details for a clean and balanced design.
To elevate your branding further, pair your logo with brief but impactful text that complements your business identity.
Adding Supporting Branding Text
A short tagline, return policy, or social media handle can add depth to your branding. For instance, a tagline like "Quality You Can Trust" or a social handle like "@YourBrand" can reinforce your identity. However, it’s important to keep the header simple and uncluttered. Move secondary branding details - like "Follow us @yourbrand" or "30-day return policy" - to the footer. This approach mirrors how major U.S. retailers structure their receipts, ensuring the main transaction details remain easy to read.
"The fastest way to make a receipt feel like yours is to add your logo. ... The trick is to place it where it can't be missed - right at the top is usually best." - ReceiptGen Team
Formatting Receipts for a U.S. Audience
To ensure your receipt resonates with a U.S. audience, follow these standard formatting practices:
| Element | U.S. Standard |
|---|---|
| Address | Street, City, State Abbreviation, ZIP (e.g., Austin, TX 78701) |
| Phone Number | (512) 123-4567 format |
| Date | MM/DD/YYYY (e.g., 06/04/2026) |
| Currency | USD with two decimal places (e.g., $14.99) |
| Sales Tax | Labeled "Sales Tax" with the specific rate (e.g., Tax 8.25%) |
| Payment Method | Full label (e.g., PAID WITH VISA ****4242) |
For a professional yet approachable design, use fonts like OCR-A or a clean sans-serif typeface. These fonts mimic the output of U.S. thermal printers while maintaining an upscale feel - perfect for boutique businesses or consulting firms looking to leave a great impression.
Checking Quality and Putting Logo Receipts to Use
After uploading and positioning your logo, it's essential to ensure that the final receipt looks polished and works well for your business needs.
Checking Logo Display and Print Quality
Before exporting your receipt, carefully inspect how your logo appears. The editor's live preview is a great tool for spotting alignment issues, awkward spacing, or color inconsistencies. Zoom in on the logo to check for sharpness - if it looks blurry or pixelated, it might look worse when printed.
Print a test copy to confirm the logo's clarity. If needed, adjust the contrast (15–25%) or brightness (up to 20%) to improve its appearance. Don’t forget to check the mobile view to ensure the logo aligns properly on smaller screens. Once everything looks sharp both digitally and in print, you’re ready to export.
Exporting and Reusing Receipt Templates
After verifying the quality, you can save time by reusing templates that are well-organized. Receipt Generator allows you to export high-resolution PNG receipts, which are perfect for digital sharing and record keeping. Use clear file names to keep your records organized, and consider storing your files in secure cloud services like Google Drive or Dropbox to prevent data loss.
"PDF download is perfect for record keeping - and it's actually free!" - Maria L., Small Business Owner
By saving a template, you can quickly update details like line items, dates, and totals for future transactions, while keeping your logo, store information, and formatting intact.
Ways to Use Logo-Branded Receipts
A receipt with your logo does more than serve as a billing record - it also meets IRS documentation requirements and has a variety of uses. For example, these receipts are ideal for professional record keeping and are even used as realistic props in film production.
"The thermal paper texture and real store receipt templates make our scenes look 100% authentic." - James T., Film Producer
The digital receipt market is expected to grow from $1.73 billion to $9.145 billion by 2035, at a CAGR of 16.33%. This shows how branded digital receipts are becoming the norm. Adding your logo to every receipt ensures you stay ahead in this growing trend.
Conclusion: Adding Logos to Receipts Online
Adding a logo to a receipt is simple and quick. Start with a transparent PNG file (at least 300 DPI), upload it using Receipt Generator's editor, position it in the header, tweak brightness and contrast if needed, and preview to ensure it looks sharp and professional.
This small step not only improves the appearance of your receipts but also strengthens your brand’s credibility. The entire process takes less than a minute. As the ReceiptGen Team explains: "A branded [receipt] does so much more - it reinforces your professionalism and keeps you top-of-mind." For such minimal effort, the payoff is clear.
Receipt Generator is a powerful tool for freelancers, small business owners, and creative professionals who need polished, branded receipts fast. With no signup required and an easy-to-use live preview editor, you can create professional receipts in no time. Switching to digital tools like this can save small businesses up to 70% of the time spent on administrative tasks, freeing up valuable hours for other priorities.
Whether you're branding receipts for your business, digitizing old records, or creating realistic props, adding a logo ensures each receipt looks purposeful and professional.
FAQs
What’s the best logo size for a receipt header?
For a polished receipt header using Receipt Generator, start by uploading a clear, high-quality logo. The tool will automatically resize it, but make sure the logo is centered and surrounded by at least 20 pixels of white space for a clean look. Once uploaded, use the preview feature to check that the logo appears sharp and well-positioned on both desktop and mobile screens.
Why does my receipt logo look blurry after export or printing?
A logo that appears blurry is often the result of using a low-resolution or improperly formatted image. To resolve this, opt for a high-resolution PNG file, ideally with transparency for better quality. Additionally, fine-tune the contrast settings in the receipt builder to improve the logo's sharpness. Before finalizing, take advantage of the preview feature to see how the logo will look at its actual size.
Can I save a branded receipt template and reuse it later?
With Receipt Generator, you can tweak receipt fields and even add a personal touch by uploading your logo. Adjust store details to align with your brand identity and create a consistent template. These templates are perfect for professional use or keeping accurate records, ensuring your receipts always represent your business.