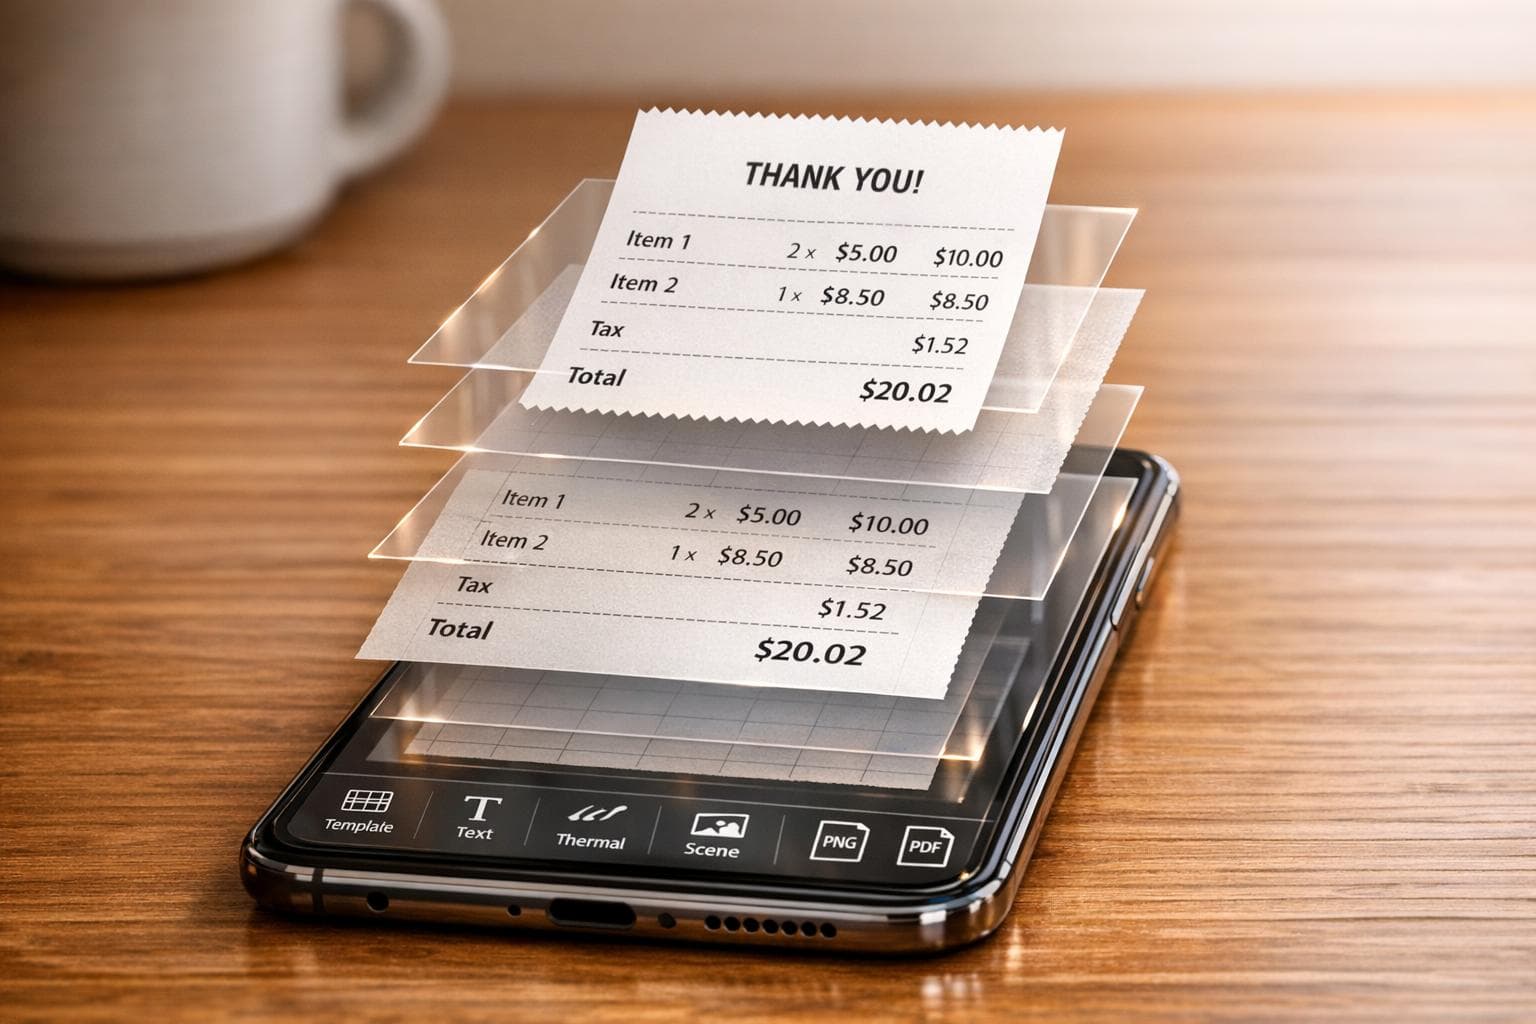
How to Get a Realistic Receipt Photo Without a Printer
Ever needed a receipt photo but don’t have a printer? You can now create lifelike receipt images directly on your device using digital tools like Receipt Generator. These tools let you:
- Choose templates from over 190 popular US retailer designs (e.g., Walmart, CVS).
- Customize details like itemized lists, taxes, dates, and payment methods.
- Add effects such as thermal textures, folds, and stains for a realistic look.
- Place receipts in scenes using AI to make them appear on surfaces like desks or tables.
Export your receipt as a high-resolution PNG or PDF for easy use in business records, expense reports, or presentations. This method saves time and eliminates the need for physical printing.
How to Use Receipt Generator to Create Digital Receipt Photos
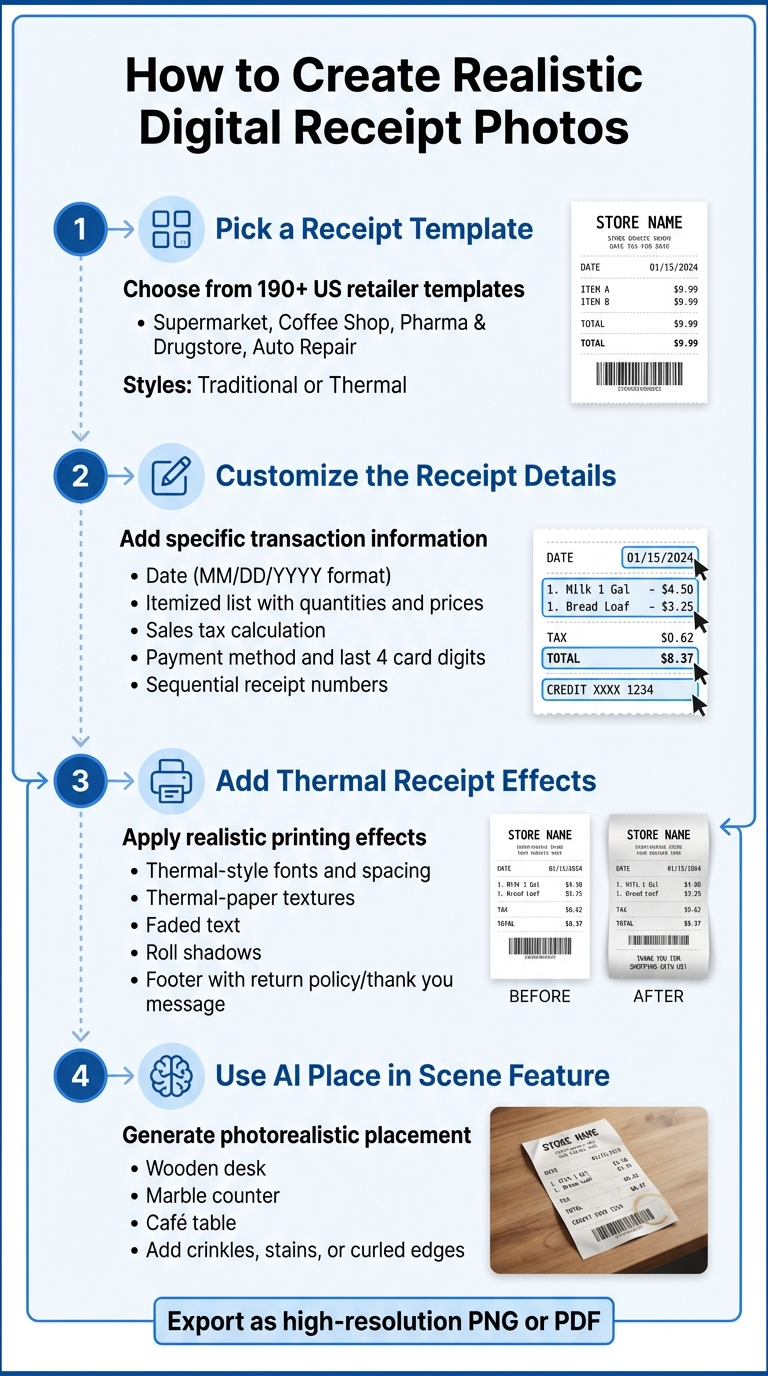
4-Step Process to Create Realistic Digital Receipt Photos
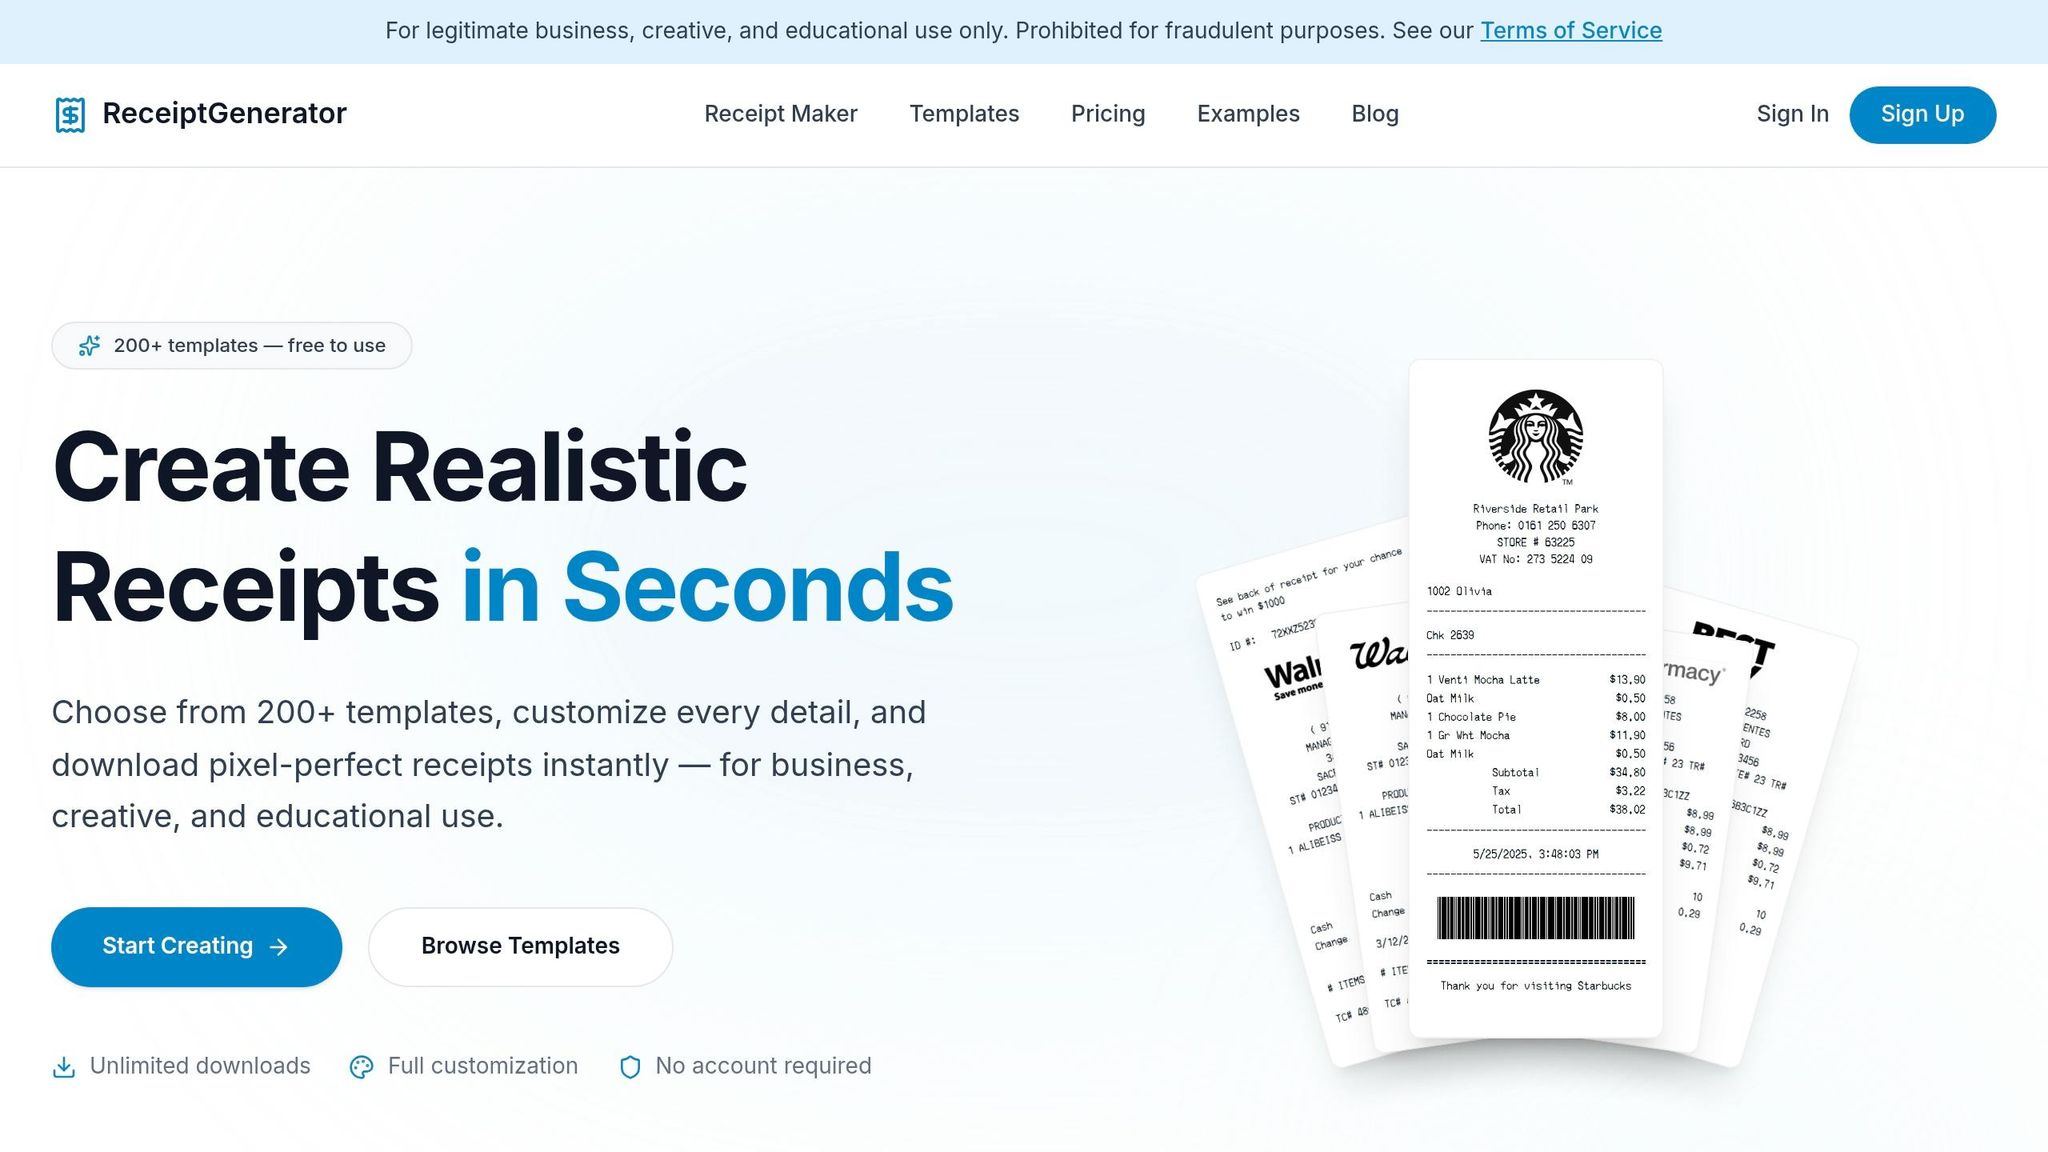
Receipt Generator makes it easy to create digital receipt images that look just like those printed by cash registers. With over 190 templates from popular US retailers, you can jump right into designing a realistic receipt - no sign-up required. Here’s how to turn your digital design into a convincing receipt photo.
Step 1: Pick a Receipt Template
Start by exploring the template library, which is organized into categories like Supermarket, Coffee Shop, Pharma & Drugstore, and Auto Repair. For instance, a Walmart-style template includes details like itemized pricing, store number, and terminal information. Each retailer's template reflects its unique style and product categories. You can also choose between Traditional and Thermal styles. Thermal templates use monospace fonts and proper spacing, mimicking receipts printed by actual point-of-sale systems.
Step 2: Customize the Receipt Details
After selecting a template, edit the receipt to include specific details. Stick to US formatting standards: enter dates in MM/DD/YYYY format and add timestamps for transactions. Show prices with a dollar sign ($) and use a period for decimals. Include an itemized list with quantities, product names, and unit prices, then calculate sales tax as a separate line. If the receipt involves a card payment, specify the payment method and the last four digits of the card number. You can also assign sequential receipt numbers to keep everything in order.
Step 3: Add Thermal Receipt Effects
Receipt Generator automatically applies thermal-style fonts and spacing to make your digital receipt look like it was printed on a real receipt printer. You can enhance this effect by adding thermal-paper textures, faded text, and realistic roll shadows. To make the receipt even more believable, consider including a footer with details like a return policy, warranty information, or a thank-you message.
Step 4: Use the AI Place in Scene Feature
Take your digital receipt to the next level with the AI Place in Scene feature. Describe the setting where you want the receipt to appear - like on a wooden desk, marble counter, or café table - and the AI will generate a photorealistic image. It aligns the receipt’s text and numbers with the paper’s folds and adjusts to the background’s perspective. You can also add effects like crinkles, stains, or curled edges. For example, you can request “a crinkled receipt on a dark café table” or “add a coffee stain” to make the image feel even more lifelike.
sbb-itb-2232899
How to Improve Receipt Photos with Photo Editing
Once you've created a digital receipt, photo editing can give it a lifelike finish by adding texture, depth, and a touch of realism. The process involves fine-tuning lighting, incorporating natural wear, and seamlessly blending the receipt into its surroundings.
Choose Backgrounds and Adjust Lighting
A good background paired with proper lighting can turn a flat, digital image into something that feels authentic. Surfaces like wooden desks, marble countertops, or café tables offer natural textures and color variations that help ground the receipt in a believable setting. Pay attention to the dynamic range - the difference between the darkest and brightest areas of the image - when placing the receipt on textured backgrounds.
"If a photo has poor dynamic range, the image can appear flat or gray. Without a rich black point and a bright white point, the gradient of tones in an image is much more limited, giving it less contrast." - Adobe
Start by adjusting the exposure to set the overall brightness. Then, refine the contrast by tweaking the black and white levels, ensuring the receipt paper has a tangible texture instead of looking overly smooth. Use the highlights and shadows sliders to recover details in both bright and dark areas. For a soft, natural glow, duplicate the receipt layer, apply a Gaussian blur (10–20 pixels), and set the blending mode to "Soft Light" or "Overlay."
Once the lighting is dialed in, you can focus on making the receipt look worn and handled.
Add Folds, Shadows, and Wear Marks
Real receipts often show signs of use, like folds, creases, and smudges. To mimic these, use a darken brush along the edges and creases to create depth. Add subtle crumple effects, smudges, or even light stains to give the receipt a more "lived-in" appearance.
For a faded or aged look, slightly reduce the contrast to soften the image. You can also add dust effects or light leaks to suggest wear over time. These small touches make the receipt feel less like a digital design and more like a physical document that's been handled and stored.
Advanced Methods for Realistic Receipt Photos
Taking your receipt photo editing to the next level involves techniques that fine-tune the realism of your digital creations. These methods focus on texture, print effects, and regional details to ensure your receipts look as authentic as possible.
Add Paper Texture and Print Effects
One of the key factors in achieving a realistic receipt is replicating the texture of paper and the unique appearance of thermal printing. Real receipts often have visible grain, slight imperfections, and the dotted style of thermal printers, which standard digital fonts can't fully replicate.
Tools like Receipt Generator come with built-in overlays such as "aged", "worn", or "creased" to mimic the look of a receipt that's been handled. These overlays create subtle disruptions in smooth lines, adding natural-looking variations. For fonts, opt for thermal or typewriter-style fonts rather than typical sans-serif options. This choice creates a more accurate dot-matrix effect, similar to the output of actual thermal printers.
If you're using editing software, you can also overlay high-resolution paper textures. Stock libraries offer a wide range of options, including paper grain, grunge, and thermal paper textures. Apply these textures as overlay layers and adjust the blending mode to Multiply or Overlay with 15–30% opacity. Adding light ink variations or faint horizontal lines can further enhance the effect, making your receipt look like it just came out of a printer. These details combine seamlessly with earlier customization steps to create a polished, realistic result.
Include US-Specific Receipt Details
For receipts intended to appear as US-based, incorporating region-specific details is crucial. The formatting and layout of US receipts follow certain standards that can make or break their authenticity.
Start by using templates inspired by major US retailers like Target, Walmart, or CVS. These templates already include elements like the correct address format (Street, City, State, and 5-digit Zip Code), currency formatting with a "Start by using templates inspired by major US retailers like Target, Walmart, or CVS. These templates already include elements like the correct address format (Street, City, State, and 5-digit Zip Code), currency formatting with a "$" symbol and two decimal places, and footer elements such as return policies or "Thank You" messages [28]. Including a unique, sequential receipt number is also essential, as it adds credibility and avoids raising suspicion during audits [15].quot; symbol and two decimal places, and footer elements such as return policies or "Thank You" messages. Including a unique, sequential receipt number is also essential, as it adds credibility and avoids raising suspicion during audits.
"Many states require [sales tax] by law. Include your tax ID number if applicable." – Receipt Baker
How to Export and Use Your Receipt Photos
Once you've created a realistic digital receipt, the next step is choosing the right format and managing it effectively. Exporting your receipt in a high-quality format ensures it meets your needs for both digital and physical use.
Export High-Resolution PNG Files
For most digital purposes, PNG is the go-to format. It retains sharp details without introducing compression artifacts, which is crucial for receipts where every detail - like totals, text, and barcodes - needs to stay clear for accounting or audits. When exporting from Receipt Generator, select the PNG format and ensure the resolution is high enough to keep all transaction details crisp.
If you need a format for printing or formal submissions, PDF is the standard option. PDFs preserve formatting across devices, making them ideal for tax documentation or archiving. While JPG is a common format for general storage, it uses compression that can blur text and reduce clarity.
Before finalizing your export, double-check all the details to ensure accuracy. Receipt Generator’s AI Place in Scene feature also allows you to preview and export your receipt as if it were on a surface like a desk or counter, giving it an extra touch of realism without requiring a physical printer.
Once you've exported the receipt, it's time to integrate it into your business records.
Present Receipt Photos in Business Records
Now that you have high-quality receipt exports, organizing and storing them properly is key to efficient record-keeping. Create folders sorted by month, client, or transaction type to make retrieval quick and easy. The IRS advises keeping receipt records for a minimum of three years from the date you filed the associated tax return - or up to six years if there was a significant underreporting of income.
"Digital receipts are better for most situations. They're easier to store, search, and organize. They can't fade or get lost in a drawer." – Receipt Baker
For added convenience, upload your PNG files to bookkeeping apps or cloud storage platforms like Google Drive, Dropbox, or OneDrive. This helps prevent data loss and ensures you can access them from any device. Assign sequential receipt numbers (e.g., 001, 002, 003) to keep everything in order, which can help avoid gaps that might trigger concerns during audits. To maintain accurate financial records, regularly reconcile these receipts with your bank statements.
Conclusion
Creating realistic receipt photos without a printer has never been simpler, thanks to digital tools. Platforms like Receipt Generator offer features that mimic thermal textures, use authentic fonts, calculate taxes, and even include sequential numbering. The AI Place in Scene feature takes it a step further, letting you place your receipt on any surface - be it a wooden desk or a marble countertop - making the digital version look like a genuine, printed receipt.
One platform alone has generated over 1.5 million receipts, including an impressive 5,400 in just one day. And don’t worry about legitimacy - digital receipts hold the same legal standing as printed ones for tax filings and expense reports.
These tools are a game-changer for anyone managing business records. Whether you’re a small business owner tracking expenses, a freelancer organizing invoices, or someone replacing a lost receipt, digital solutions save you the hassle of printers, ink, and paper while delivering professional-quality results in under a minute. You can export these receipts as high-resolution PNG files, sort them by month or client, and store them in the cloud for easy access on any device.
Switching from physical to digital receipt management isn’t just practical - it’s also economical and better for the environment. With over 300 million pounds of receipt paper produced annually in the U.S., going digital is a choice that benefits both your budget and the planet.
FAQs
Will a digital receipt photo be accepted for taxes or expense reports?
Yes, digital receipt photos are usually accepted for taxes or expense reports, as long as they’re clear and include key details like the date, amount, vendor name, and a description of the purchase. Make sure the image is easy to read and contains everything required to meet documentation guidelines.
How do I make the receipt look truly “thermal” and not computer-made?
To create a digital receipt that looks convincingly "thermal", pay close attention to the details that define real thermal paper. Start by mimicking its texture and imperfections - think halftone patterns, soft gradients, and tiny creases or folds. Adjust the lighting to replicate the slightly uneven glow typical of thermal printing. For added authenticity, use high-resolution images of actual thermal paper as a reference during your editing process. These subtle touches can make all the difference in achieving a realistic look.
What export settings keep receipt text sharp and readable?
To keep receipt text crisp and easy to read, always export the file in PDF format. PDFs do a better job of preserving text clarity compared to PNG or JPEG files. For digital purposes, make sure to use a high resolution and check the output by zooming in to 400% to confirm the text remains sharp. PDFs are especially useful for printing or presentations because they retain clear text and high-quality images.