Receipt Format Guide: What to Include in 2026
A receipt in 2026 should do one job first: prove payment fast and clearly. If I’m checking a receipt, I want to see the seller, receipt number, date and time, item list, tax, total, payment method, and return terms right away.
Here’s the short version:
- A receipt is issued after payment
- An invoice is sent before payment
- Every receipt should show itemized charges, subtotal, tax, discounts, and final total
- Card details should be masked and should not show the expiration date
- Digital receipts count too, as long as the record is saved in a fixed format like PDF
- The IRS record retention period is generally 3 years
- Dates should use MM/DD/YYYY
- Money should use U.S. format, like $1,234.56
- Time should use a 12-hour clock, like 2:37 PM
A complete receipt is not just a proof-of-payment slip. It also helps with returns, expense records, and tax support. For business purchases, a missing tax line, skipped receipt number, or weak seller details can cause problems later.
I’d keep the format simple and easy to scan:
- Header: business name and contact details
- Top details: receipt number, date, time, transaction reference
- Body: item description, quantity, unit price, line total
- Totals: subtotal, sales tax, discounts, grand total
- Footer: payment method, masked card digits, return policy
Here’s a quick comparison of the related documents:
| Document | When I’d Use It | Main Purpose |
|---|---|---|
| Invoice | Before payment | Ask for payment |
| Receipt | After payment | Confirm payment was made |
| Order confirmation | After checkout | Confirm order placement |
| Refund slip | During a return | Confirm money was sent back |
In short, I’d format every receipt so the payment facts are easy to find in seconds. That means clear seller details, a numbered record, plain item lines, separated tax, and a final total that stands out. That is what makes a receipt usable in 2026.
Required Fields Every Complete Receipt Should Have
With the format rules out of the way, here’s the practical part: what a receipt needs to include so it’s complete, easy to read, and simple to file.
Business Identity and Transaction Details
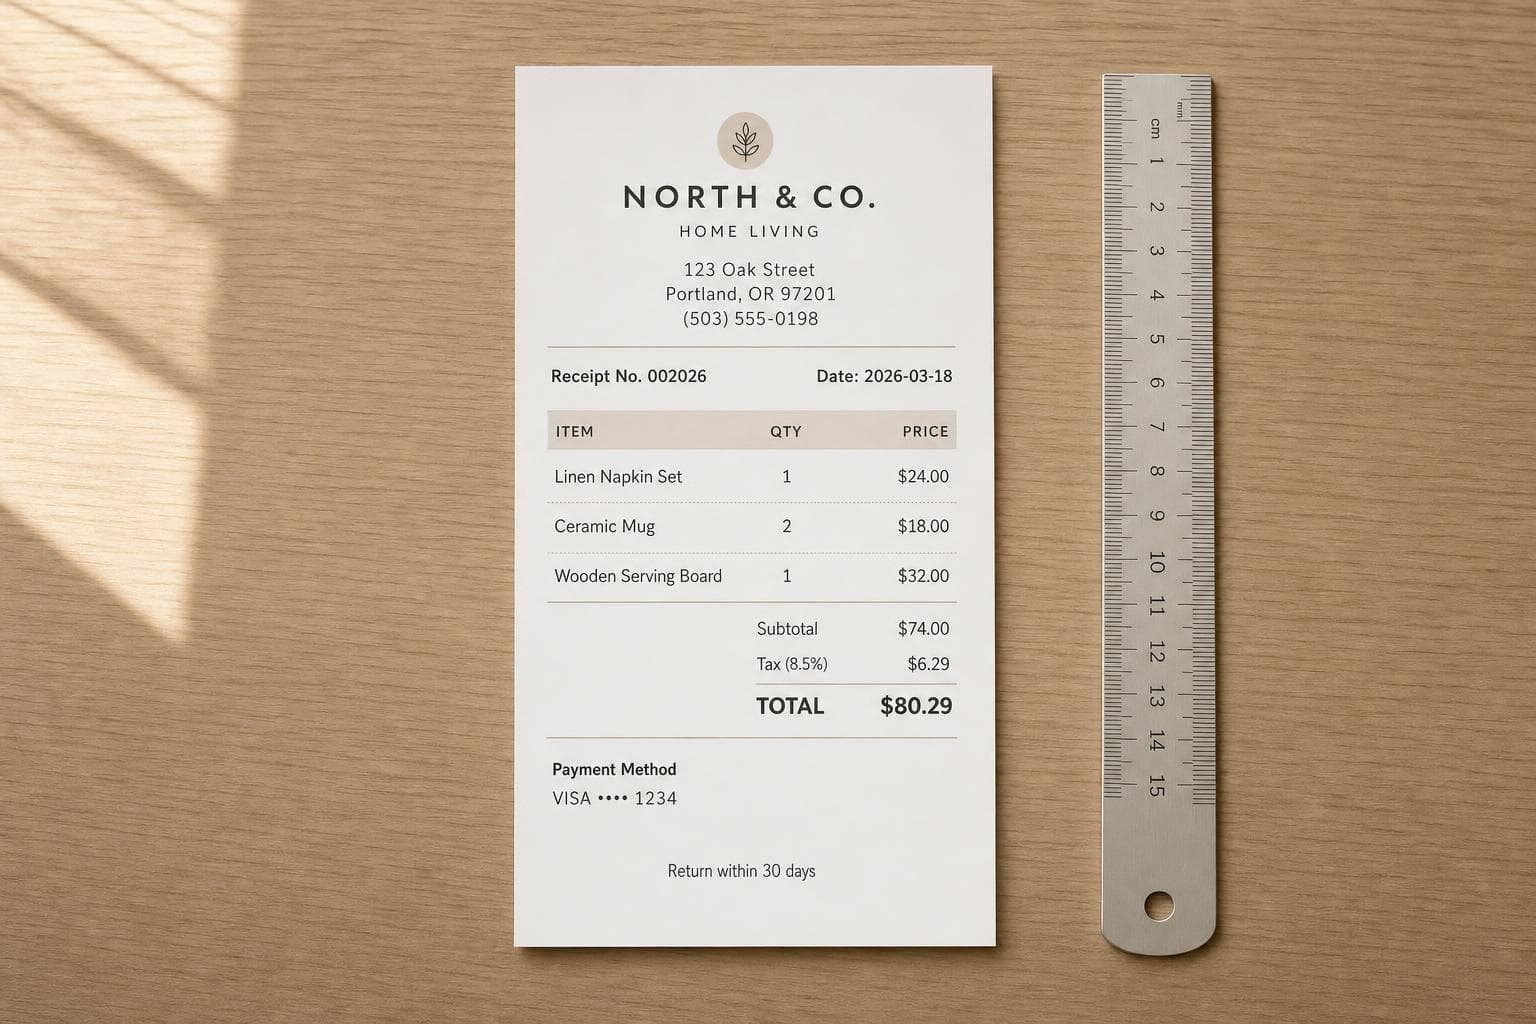
Start with the seller’s details. That means the legal business name, street address, phone number, email, and website. For B2B receipts, include a physical address and the EIN. A P.O. Box by itself doesn’t cut it.
Every receipt also needs a unique, sequential receipt number, like RCT-2026-0047. Try not to skip numbers. If there are gaps in the sequence, that can draw extra attention during reconciliation or an audit.
For card or digital payments, add the transaction ID or processor reference. Match that with the exact date and time the payment was received, not the time the receipt was printed. If your business uses more than one register, include the cashier or register ID too. That way, the sale can be tied back to a specific point of sale.
Line Items, Subtotal, Tax, Discounts, and Total
Each line item should spell out what was sold in plain terms. Include:
- A specific description
- Quantity
- Unit price
- Line total
For example, Blue Cotton T-Shirt (M) × 2 @ $24.99 = $49.98 is clear and easy to check.
Under the item list, show the subtotal first. Then list the sales tax with both the rate and dollar amount, any discounts as negative amounts, and the final grand total. The total should stand out more than any other number on the receipt.
Payment Method, Customer Details, and Return Policy
The payment section should show how the sale was paid, whether that was cash, credit card, ACH, or a mobile wallet like Apple Pay. If a card was used, show only the last five digits and leave off the expiration date. An authorization code isn’t required, but it can help if there’s ever a dispute.
Customer name and address are optional for retail sales, but they’re often useful for B2B transactions, rent, and higher-ticket purchases. In the footer, add a short return policy, such as "Returns accepted within 30 days with original receipt." A simple note like that can head off disputes before they begin.
The table below pulls the main fields into one quick reference.
| Field Category | Key Fields | Why It Matters |
|---|---|---|
| Business Identity | Legal name, address, phone, email, EIN (B2B) | Identifies the seller and supports recordkeeping |
| Transaction Info | Receipt number, transaction ID, date, time, cashier/register ID | Creates a traceable, auditable record |
| Line Items | Description, quantity, unit price, line total | Supports returns and expense tracking |
| Financials | Subtotal, tax rate/amount, discounts, grand total | Provides clear price and tax transparency |
| Payment | Method, last 5 digits (card), auth code | Confirms payment details and supports compliance |
| Policy | Return/refund window and conditions | Sets expectations and reduces disputes |
sbb-itb-2232899
Optional Fields That Add Value Without Cluttering the Receipt
Once the core transaction fields are set, add only the details that make the receipt clearer or more useful. These extra fields can make the receipt feel more polished and easier to use, but they should never pull attention away from the numbers that matter most. Place them below the subtotal, tax, and total so the receipt stays easy to scan.
Branding, Loyalty Programs, and Footer Details
A logo at the top of the receipt can help build trust. For digital receipts, brand colors can back that up and make the format feel more polished.
Below the totals or in the footer, you can add a few light-touch details that help bring customers back, such as:
- A short thank-you message
- Loyalty points earned
- A promo code
That kind of info can support repeat business without getting in the way of the financial details.
Digital Receipt Elements for Email, PDF, and Mobile
Digital receipts can do a bit more than printed ones. A clear payment status label like "Paid in Full" near the total helps people confirm the status at a glance. A QR code can help with loyalty program use or digital filing. And for digital product receipts, a direct download link makes the receipt more useful right away.
It also helps to issue digital receipts as fixed-layout PDFs and format them for phone screens too. That way, the receipt keeps the same structure across devices instead of shifting around and becoming hard to read.
No matter the format, the same core transaction facts should stay in place: date, unique receipt number, itemization, and totals. Printed, emailed, and mobile receipts can look a little different, but that key information should always appear.
With optional details in place, the next step is to organize the receipt into a clear header, body, totals, and footer.
How to Organize a Receipt Layout for Print and Digital
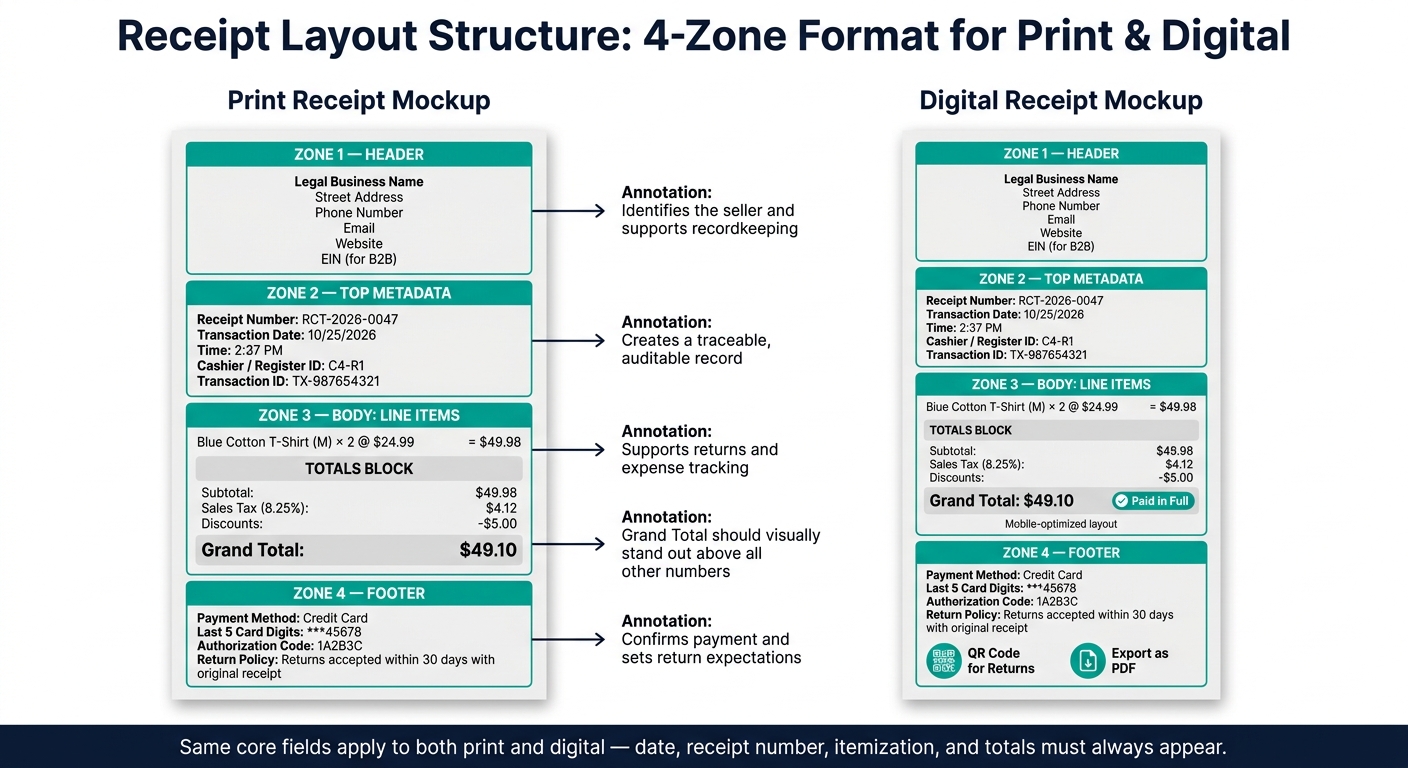
Receipt Layout Structure: 4-Zone Format for Print & Digital
Use a Header, Body, Totals, and Footer Structure
Once you’ve defined the required fields, the next step is simple: place them into a clear four-zone layout. Use the same setup for both print and digital receipts so records are easy to scan and check.
Start with the business identity in the header. Then move into transaction details, itemized charges, totals, and footer details. Keep the body focused ONLY on the purchased items. Group the subtotal, tax, discounts, and grand total in one totals block so nothing gets lost.
- Header: business identity
- Top metadata: date, time, receipt number
- Body: itemized purchases
- Totals block: subtotal, tax, discounts, grand total
- Footer: payment method, return policy
That structure works because it follows the way most people read a receipt: first who sold it, then when it happened, then what was bought, and finally what was paid.
Formatting Choices That Improve Readability and Accuracy
For printed receipts, thermal printers usually use narrow 60 mm–80 mm paper widths. That small space means layout matters a lot. Leave enough margin space to avoid cutoffs, and add small gaps between rows so each line is easier to read. Also, make the grand total bold so it stands out right away.
For digital receipts, keep price columns right-aligned. It’s a small formatting move, but it makes totals much easier to check at a glance. Export digital receipts as non-editable PDFs so the layout stays intact and the record remains fixed.
In both cases, the hierarchy stays the same: identity at the top, purchased items in the middle, and totals plus policy details at the bottom.
Applying the Checklist with Receipt Generator Templates
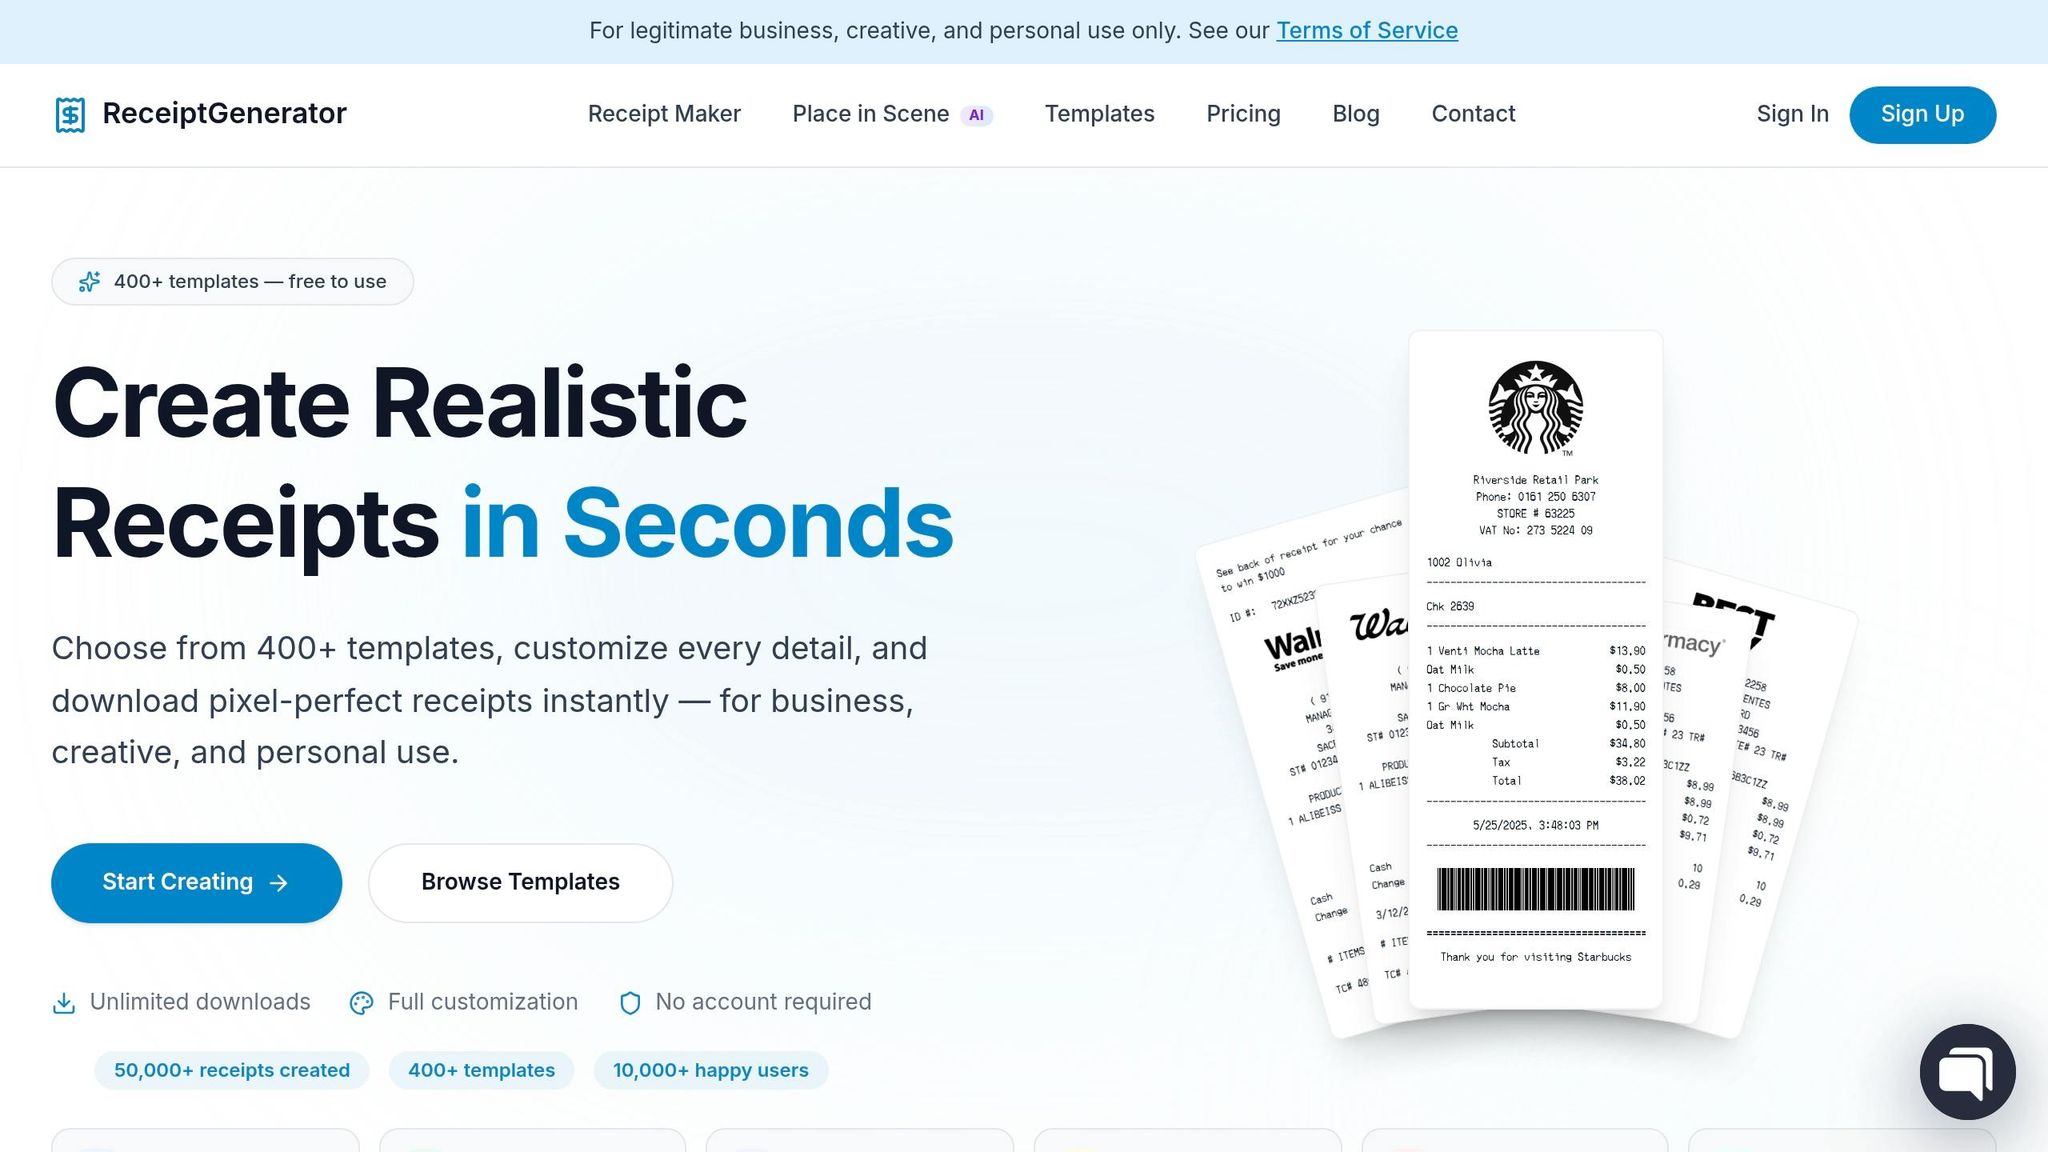
Receipt Generator templates make this setup easy to apply across both print and digital receipts. Add the header first, enter exact line items in the body, and keep the subtotal, taxes, discounts, and final total clearly separated.
When those parts are laid out cleanly, the receipt becomes much easier to scan, whether someone is holding a paper slip or opening a PDF on their phone. Use this structure as the base for the final checklist.
Conclusion: The 2026 Receipt Format Checklist
Use this checklist to review every receipt before you print it, email it, or save it.
A complete receipt needs the right details, and those details should be easy to spot. It should include the seller’s legal name, address, phone number, email, tax ID or EIN, receipt number, transaction date and time, itemized purchases, totals, payment method, and return policy.
The financial section should list the subtotal, tax rate, and tax amount as separate line items, along with any discounts and the grand total. Finish with the payment method, masked card digits, and a short return policy in the footer. For audit-ready recordkeeping, save digital receipts as fixed PDFs. When all of these fields are in place, the receipt is accurate, professional, and ready for personal records and expense tracking.
If you want a faster workflow, use Receipt Generator templates to apply the checklist. You can use Receipt Generator templates to fill in the checklist and export a clean receipt.
FAQs
Do handwritten receipts still count?
Yes. Handwritten receipts are valid as long as they include the key sale details: the seller, the date, the goods or services, the payment method, and the total amount paid.
If you want the receipt to look more polished and hold up better in your records, add a sequential receipt number, a signature or other form of confirmation, and keep a copy for yourself.
When should I include customer details?
Include customer details like the customer’s name and contact information when you need to clearly tie a payment to a specific person or business.
These details are often optional. Still, they’re especially helpful for B2B transactions, large purchases, repeat customers, and long-term projects.
They can also make life a lot easier when you’re dealing with:
- Returns
- Warranties
- Expense verification
- Follow-up communication
How long should I keep receipts?
In the United States, the IRS generally expects you to keep receipts for at least three years. Those receipts help back up your income and expenses and show that your records line up with tax rules.
It also makes sense to store receipts in a secure place and compare them with your bank statements from time to time. The exact recordkeeping needs can vary based on your business activity, so clean, up-to-date records matter if the IRS ever audits you.